Blog Feed

Midcentury bathroom refresh

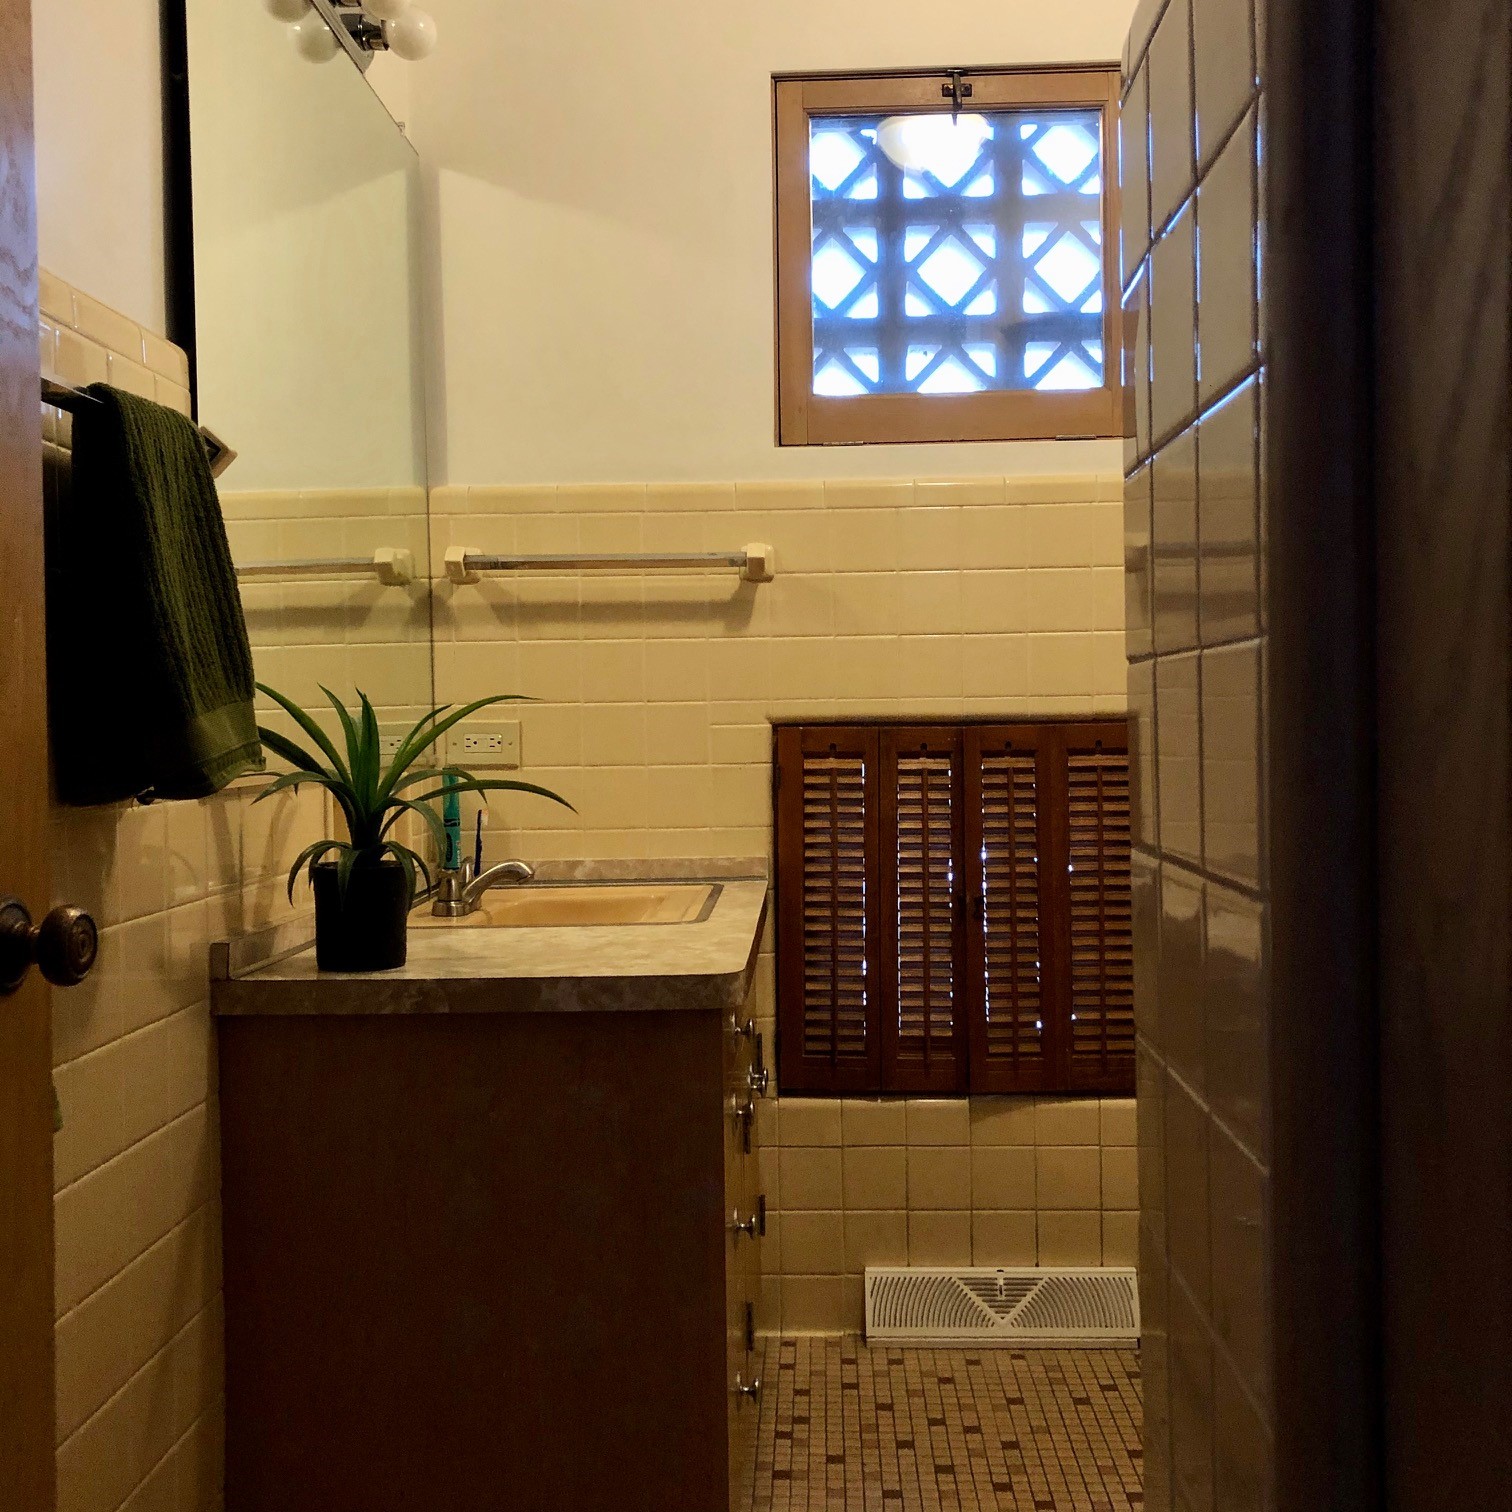
We’ve been plugging away on a minor bathroom refresh — not a gut by any means but refreshing and working with what we have. We still have two bathrooms in our house (on main floor) with all original finishes. They are great bones and easy to work with, to keep the vintage feel.

I started in this project with working hard to clean the tile and steam it to as close to perfection as I can. It was installed in 1960, so I most definitely didn’t get to perfection, but it’s much better and cleaner than it was!

We knew we wanted to paint. I was toying with these two colors but in the end we decided it was too close to the tile color and wanted something different.

We went ‘shopping’ to our downstairs closet that houses all our paint from previous projects. Low and behold there was a full gallon of this Gray Horse from Benjamin Moore which we loved in a prior project. So, I was ready and had time to paint AND this full can was in front of me ready to use. Off we went with the Gray Horse. I have to admit I was a bit skeptical, because I was worried this color was ‘too cool’ for the room, but once it was done, I LOVED it! And now we can play with decor to bring in different color accents.

The biggest transformation for us was our new vanity light. We previously had a very basic three-bulb light. This 4-bulb globe vanity light really transformed the space!

I will keep you posted on our finishing design touches. I have a great shelf I want to put up, we’re going to get some new towels and a rug and likely some plants. Now the more fun stuff!

Brighten up vintage brass with Peek cleaner

There aren’t many products I’d call a miracle, but Peek Metal Polish & Protecting Cream is one of them! Someone recommended it to me when we did our kitchen renovation in 2019, to help clean up our brass hardware. It worked wonders and we have since ordered many more tubes! I’ve even been using it to clean up our shower door in our current bathroom refresh.

These were the hardware pieces we were working on last year:

They are beautiful and we wanted to keep them! See below for a sample before and after with Peek:

Left is before, right after. Doesn’t erase EVERY flaw, but restores beautifully!

You basically put the blue cream onto the metal and then scrub and scrub some more with a soft cloth. It will clean, brighten and restore what you are working with!

We also used it to clean up some chairs we got on Craigslist.

It really brightened up and removed much of the ‘rust-looking’ grime on the chairs. This is now a must-have in our midcentury house and I would recommend it to anyone working on a vintage / midcentury restoration project involving brass, chrome or metals!

Picking a midcentury bathroom vanity light

Next step in our bathroom refresh is to pick a light to replace the boring, standard one someone added at some point. Here’s what’s in the room now:

Original tile and vanity — need to replace the light.

We didn’t find any used / thrifted lights off Craigslist or Offerup, so we’re going ahead with getting a brand new one, staying with a midcentury, chrome look.

Having new, brighter light in here will really help brighten up the room. It’s a fairly small bathroom space so more light will really make it feel bigger and brighter.

I asked my awesome Insta followers for some help in picking from a few options. I narrowed down to three options — all with a chrome, 4-bulb layout to get the most light we can.

These are the three I came down to. The popular vote from my followers was B — which is awesome because that’s also the one that we decided would be best as well. See my homegrown little Photoshop mockup as well. I am a sucker for any globe lights…I think they just look so perfect in a midcentury space.

I found it on Amazon for about $170 — so we’re going to give it a try.

They also had it in a beautiful gold color. I really am loving all the gold-fixtured bathrooms lately, but with everything else in the bathroom being chrome — hardware, shower stall and towel bars, we’re going to stick with it.

So we have a few more steps before we get to putting the light up…still working on cleaning the tile to no end, need to caulk, paint and just get prepped for that space.

I’ll loop back with photos once we get it up!

A few other lights I love!

Restoring original, vintage tile

For any of you living in a midcentury home, you likely have some killer, original tile in your space. We have two bathrooms that are currently untouched, built in 1960. As you would expect, they are filled with glorious mosaic tile on the floor — full of midcentury charm. As you also likely know if you own a home from the 1960s, tile and materials from back then seem to last WAY longer than what is done nowadays. We love the tile and just want to restore and preserve what we have.

Our newest project began on our ‘brown bathroom’, as we call it. It’s basically our guest bathroom, as we don’t have a master bath, like many homes from this era. Here’s what we’re working with:

It’s really a great core and some beautiful tile. We’re embarking on a low budget refresh / small renovation to just spruce it up.

Step one is working to get the tile as cleaned up as we can:

You can see the grout is pretty dirty. I asked my amazing Insta followers for advice and many suggested a steamer. I was confident it would work, but my husband thought otherwise.

Well…results are amazing! We are not yet done…this is a lot of elbow grease and time. But I got this incredible product from Amazon and it’s working wonders.

I am just pushing the small nozzle around grout line by grout line, scrubbing, wiping away the gunk (which is amazing to see coming up, by the way), and doing the process over and over in each spot. Taking a small section at a time. I’ve got some trouble spots in the middle of the room that is proving tougher to clean up, but I’m going to keep plugging away.

Plan is to get it as clean as we can, then seal it up.

Follow along to watch progress @the_mod_bar.